Website-Einstellungen

Lager
Spracheinstellungen
Währungseinstellungen
Produkte
Informationsmaterial
Video-Bibliothek
Cx Family Common Mode Chokes
0402CT Low Profile Chip Inductors
XAL7050 High-inductance Shielded Power Inductors
XGL4020 Ultra-low DCR Power Inductors

Model library for Pathwave ADS®

Keysight’s Pathwave ADS is a high performance RF simulator that simplifies the design of RF systems and filters. The software is provided by Keysight and was renamed to Pathwave ADS in 2019. 

These models are based on the same schematic, element values, and coefficients for variable elements which are provided in the SPICE model document for each inductor series. From the SPICE model, 2-port S-Parameter files are extracted for each value spanning the frequency range as specified in the SPICE modelling document (typically 1MHz to just past the SRF). The S-Parameter files included with this library are referenced when a model is placed within your simulation.

Download Coilcraft RF Model Library for ADS 

 Coilcraft_ADS_RF_Library.zip  Includes all Coilcraft RF inductors for small signal AC analysis.

Installing Coilcraft RF Model Library for ADS 

  1. Download the Coilcraft_ADS_RF_Library.zip file.
  2. Use ADS to unzip the design kit selecting the file after it finishes downloading.
    Use ADS to unzip the design kit selecting the file after it finishes downloading
  3. Save the library to either your main location for ADS libraries or your current working directory if only adding to a single workspace.
    a.    Typically “C:\Users\(YourUserNameHere)\Documents\ADS
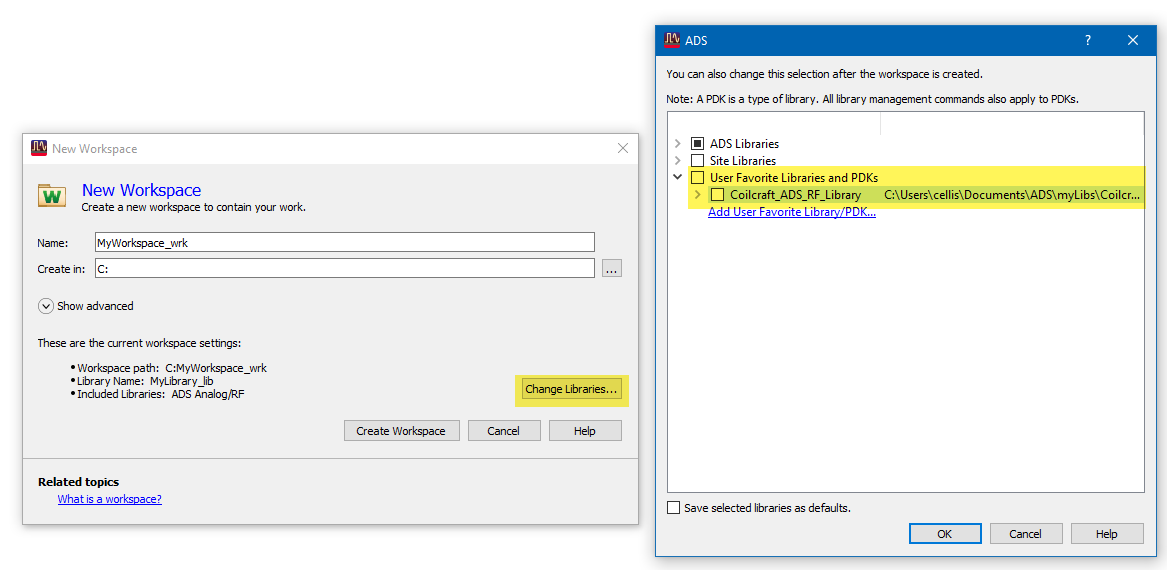
  4. The library can now be added to existing workspaces or selected when creating a new one as shown below.Picture2.png

Using Coilcraft RF models

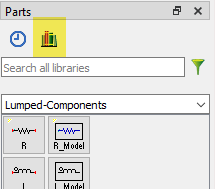
  1.  To use one of the newly installed models select the library icon in the parts selection window.
    Picture3.png
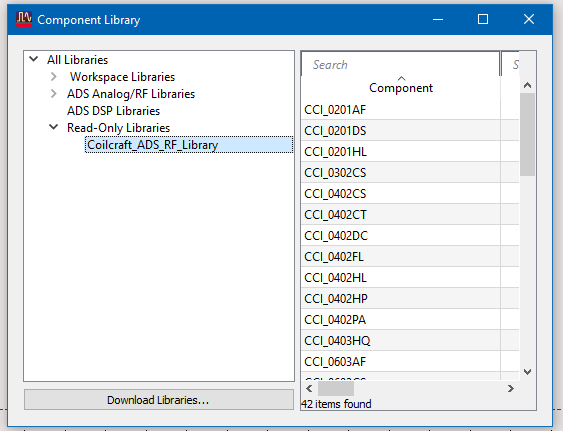
  2. The library will be under the Read-Only tab in the component library window that opens up.
    Picture4.png
  3. Select the series of the part you would like to use and double click it.
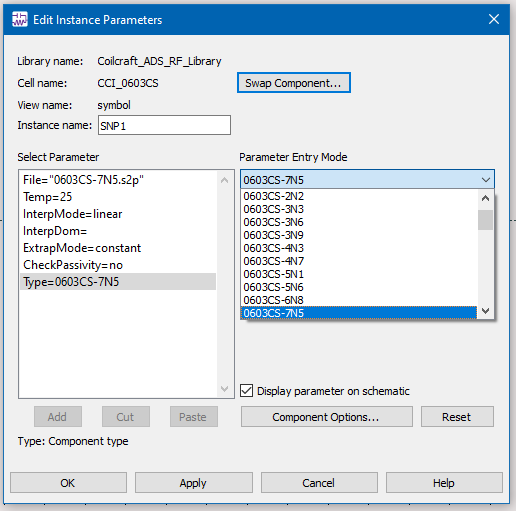
  4. Place the inductor in your circuit and double click on the inductor to open the Instance Parameters Editor.
  5. In this window click on the ‘Type=…’ parameter and a drop down box on the right will allow you to select any value from the series.Picture4.png
  6. Setup of the inductor other than integrating into the particular test circuit is now complete.